Friday, 28 March 2014

Ok so in this post it is the begining of chancing the hydro character rfom the red one int something more my own such as a witch or goblin one eyed character... still in a can shape but with some additions....


Here he is in a close up considering the change in his tone etc...


the last time we see his yellow cap thing before I delete it after highlighting it.


from a sphere I worked out how to make a ruined top hat by extruding and bending the flaps, hollowing it out by deleting the bottom faces and waring the vertexes... I would not have known that without all the cool things learnt so far...


Once shaped I chose purple for a colour. from a box I made a nose,added end coloured it green like the rest of the face.


Here is a shot of the ears beeing added. made from flattened warped boxes which were extruded inwards to create the indents. you get the idea... I have learnt how to warp and build shapes now which was a real challange before... I would be alot more likely now to use Maya in future than I might have done before.... My prejudices towards this program have lessened greatly.

Wednesday, 26 March 2014

Here are three screen shots from the "mini mart" that I started to make for the Reap shopping animation.
There definately needs to be alot more research done on buildings, props and lighting before I continue...

A wide shot from above of the shop lay out. Im sort of building it piece by piece like a dolls house....


slightly closer shot showing shelf areas and single till stand.


from the opposite angle. each element  of the build is a seperate one so that it can be changed and modeled untill it looks right.


Sketchbook scans from the maya sketchbook...


Earlyer in the year here is a design of Reaps front angle in a T pose from my sketch book. I wasnt sure If I would rule out building this character bone by bone and the eye designed seperately and placed in the socket for its own animation.

Reaps back view and possible christmas hat sketch in T pose.


Reap side view. I havnt ruled out using this character for my end of year submission but it is an old idea... which led me to.....

Mummy girl! which changed and warped into the marquette posted elsewhare on this blog. here she has a flower as part of her design which helps with her design which wasnt included on the concept marquette so I began thinking... what else could she have to feminise her apart from eye lashes as she is a walking corpse... the flower would be all wrinkled and unapealing so perhaps a scarab beatle broach on one side of her head...? she is a strong character and I may work this design into a maya character for my main maya character this year....

Christmas designs and concept ideas of Reap who has no christmas tree so these are concept images of her with a corpse made to look like a scarecrow which is all lit up with light bulbs and christmas lights to help with the christmas spirit... its pretty Burtonesque but I like it and its vibe. I didnt get chance to turn it into a Maya character but I havnt ruled it out as a future project.

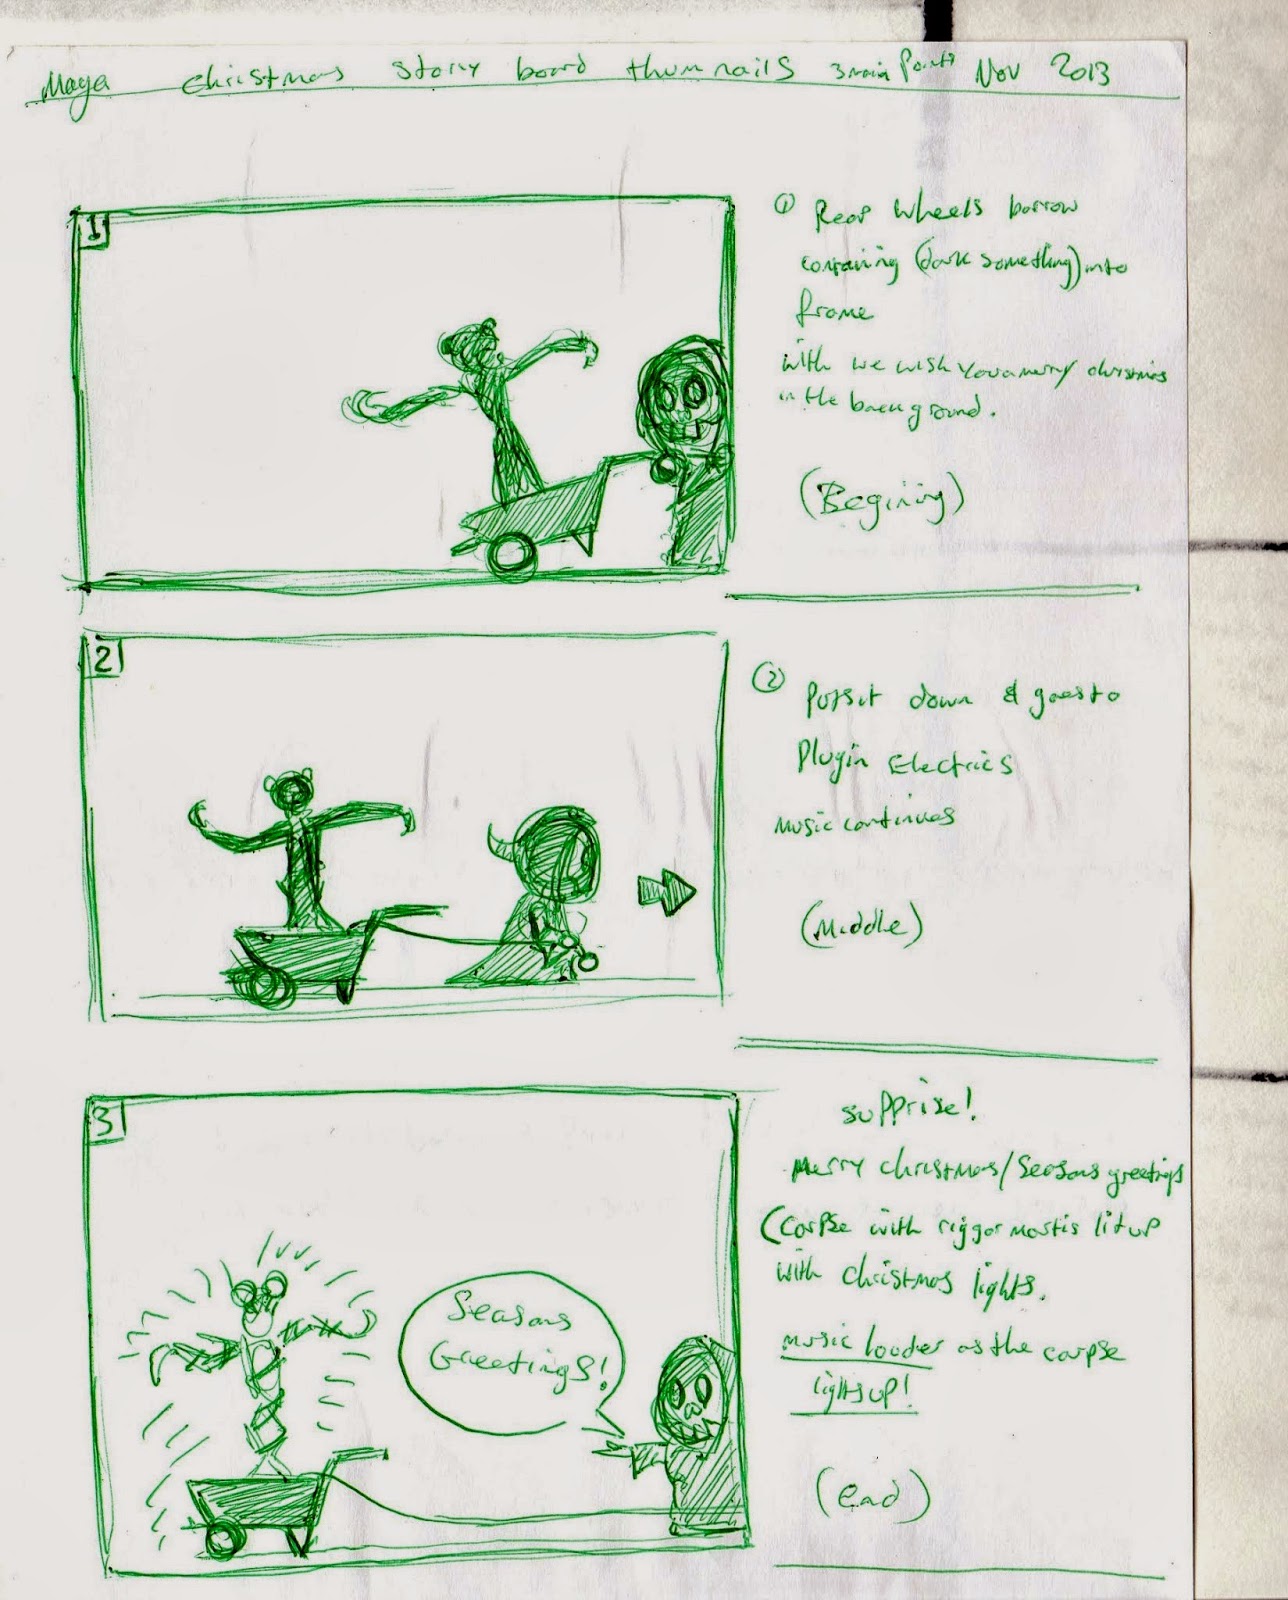
a three part sketch of the basic christmas scarecrow intro as use as an aid for story board.


here is my idea of making the skull and an exaple arm that would need to be modelled in maya as every indervidual bone....theory and concept.


here is a rough story picture layout of Reap at the general store collecting items into her basket. It shows her childlike random nature and the scale difference of her and the shopping trolly...


Two one pannel commic ideas; 1 of Reap shoppingin the super market (see last image) and 2 Reap at the beach wearing her bay watch swimming costume going surfing for the first time


drawing of an alt premise for the supermarket as she scares a security guard by hiding behind the shopping trollyand pretending it moves by itself.


Batman character idea i drew inspires by the computer game Arkham origins.... cant use this idea as it is not my own original creation.


Reap, the grim Reaper and Audry the receptionist as characters. I wish there was time to animate them this year but I need to ballance my other projects and focus on one character.


before I understood how to screen capture (shift, cmd +3 on a Mac) I thought I would try to be clever and write down the alt Maya menu that you get when you hold space bar to try to remember some of Mayas contents.


Random note page from a sketch book. Its pretty fascinating learning the difference between Nurbs and Pollygons. Had no real idea what any of this meant before this course.

Tuesday, 25 March 2014


My future mummy girl character concept model


basic story board from my sketchbook of the hydro character having his daily adventures..


screen shot of hydro character


by far my favorite part... I had no idea that you could duplicate the entire character at the click of a button. 


side view of  mummy girl marquette


I had no idea that Mayas controls effectively allowed an animator to pretty much create stop motion key frame animation within the walls of Maya. I have indeed learnt alot about building and modeling through this first project

Tuesday, 18 March 2014


This is kind of random but here is a marquette of a mummy character I wanted to build in Maya but had no idea how to go about it so I needed a concept image in the real world. I will use this as my character for my second character animation hand in... for now I will use the Fire hydrant character untill I understand Maya more effectively :)


Back to the Hydrant pillerbox character here is a screen shot of a close up of the mouth modeling before adding the teeth.


adding the teeth with the tutorial in the back ground.


modeling the tongue... At lest now I am understanding more about edges, faces and vertexes and how to manipulate.


adding the tongue to the mouth/ throat area and making it the correct shape


eye close up and flattening of thecolour area. finally using Bling and Lambert colour options. I feel it looks too perfect and that is my main gripe about 3D but this is mearly my none understanding and lack of knowlage coming to the fore.


still checking that thebuild is coming on... a shot working on the mouth.


screen shot of the hat in place. I particuarly like the jaunty angle rather than being straight on like you may expect...


character in relation to a basic background assigned its own material.


up to and including this stage in the building process I am thinking who is this character? how does he move? what is his motivation... I referenced pixar images and films for ideas and research whilst coming to terms about the movement and personality in my minds eye before drawing the story board.


showing the render with the decent shiny finish. at this stage I am learning to appreciate Maya alot more than I did in the begining and my respect for the program has grown alot.


This is whare my brain wanders and I start trying to make another model to make the hat... perhaps a russian hat would be better... more indervidual.


the coloured chracteron a plane aproaching animation stage... getting excited by this point. lots of subtle acting... story board to follow...


Trying to understand the side and front views as reference for creating a Mummy girl character... perhaps I would have been better to have drawn the chacacter into maya instead.


Mummy girl side view imported into Maya to be used as reference for the main 3d model


Mummy character side view reference image


Monday, 10 March 2014


part eight the character is elongated using the scale tool


after adding an eye the lidas were stretched up and down. this is a view from the smoothed pespective


back in mode one edge loop tool was added to create moe points of movement.


by the end of tutorial 2 and making sure the eye is sized well with lids and smoothed the character is alot closer. looking forward to tutorial part 3...

Friday, 7 March 2014

For my digital animation course we have been learning Maya and Mudbox as one of the four aspects of a four module course. The following are screen shots of my works in progress of a water hydrant character built from a tube shape as a base.


1st the character began life as a tube shape


2nd when smoothing the piece I found there needed to be edge loop tools to clean up the edge and sharpen the image.


3rd the characted needed an eye socket so an eye was put in place and the socket was created from using the difference tool.


4th the character needed more points of moveability so more edge loop tools and split tools were added.


fifth the mouth area was extuded and deleted. this was quite a challange to work out what to do but after a while it was figured out.


sixth part was tweeking the mouth and making sure it was more mouth shape and that the right details were aligned.


seventh part the smoothing tool was switched on to view progress so far then the mouth was tweeked a little further into a slight grin to show humour.